Follow this simple step-by-step guide to quickly and easily install weather stripping on your garage door. Make your garage warmer, lower your energy bills, and keep it safe starting today.
Garage door weather stripping is a soft piece that goes around the door edges to help block air, rain, and dirt from coming inside. It’s smart to update it for better energy savings, weather protection, and home care. This guide shows how to install garage door weather stripping easily.
Start by cleaning the door edges and taking off old weather stripping. Measure the door, cut the new strip to fit, and attach it with nails, screws, or strong glue. Make sure there are no gaps. Following these quick steps will help keep your garage warm, dry, and protected.
Why Garage Door Weather Stripping Matters in 2025
Energy costs are higher now, so sealing your garage is important. Garage door weather stripping blocks hot and cold air. A weather seal replacement is an easy way to save money and make your garage more comfortable every day.
The weather is getting worse with more rain, wind, and heat. Garage door weather stripping blocks rain, dust, and bugs. It keeps your garage cleaner and protects everything you store, so your stuff stays safe longer.
Strong garage door weather stripping helps your door stay in good shape for a longer time. Without sealing, dirt and water can cause damage and increase your expenses. Adding weather stripping is an easy way to seal your garage and save money.
Tools and Materials Required for Effective Weatherstripping
Having the right tools makes installation easier. Here’s a quick list of what you need for how to install garage door weather stripping.
1. Tools and Materials
- Weather stripping kit: For sealing gaps
- Measuring tape: For accurate sizing
- Utility knife or scissors: For clean cuts
- Adhesive or sealant: For sticking the weather seal
- Nails or screws: For securing the strip
- Hammer or drill: For quicker installation
- Screwdriver: For tightening screws
2. Optional Tools

- Level: To keep the strip straight
- Pencil or marker: For marking cuts or drill spots
- Work gloves: To protect your hands
- Ladder: To safely reach higher areas
Steps on How to Install Garage Door Weather Stripping
Adding weather stripping to your garage door helps keep it clean, cozy, and safe from the weather. Follow these easy steps for the best results:
1. Prepare the Door
- Use a damp cloth to clean the edges of the door and remove any dust, dirt, or old glue.
- If there’s old weather stripping, carefully take it off and remove any bits that are still stuck.
- Make sure the door edges are dry and smooth before you continue.
2. Measure the Door
- Use a tape measure to get the width and height by measuring the top, sides, and bottom of the door.
- Recheck your measurements to make sure you cut the new weather stripping the correct size.
3. Cut to Size
- Put on gloves and use a sharp knife or sturdy scissors to cut the weather stripping.
- Cut straight and smooth to make sure the weather stripping fits well without any gaps or bunching.
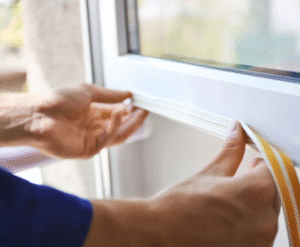
4. Attach Top and Sides
- Start with the top weather stripping, then attach the side strips one at a time.
- Press each strip firmly onto the door frame and secure it with nails, screws, or strong adhesive.
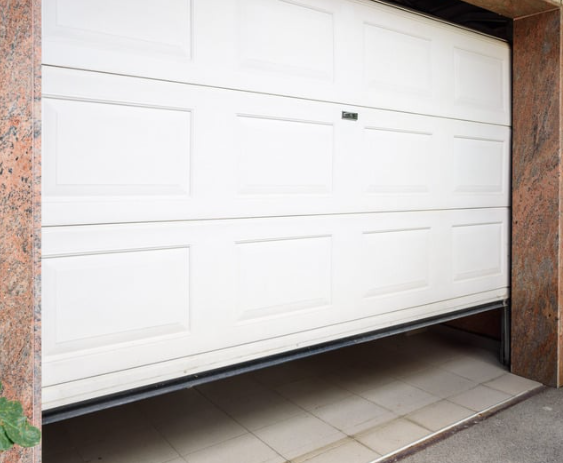
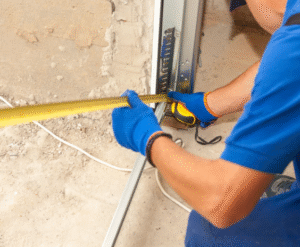
5. Install Bottom Seal
- Slide the new bottom seal into the door track or glue it in place, depending on your door type.
- Close the door and check carefully for gaps. Adjust the seal to block air and water entirely.
Avoid These Mistakes When You Install Garage Door Weather Stripping
Sealing your garage door the right way helps save energy and keeps your home safe. But small mistakes can cause big problems during the process. Here are the common mistakes to avoid when you install garage door weather stripping:
Using the Wrong Weather Stripping
Using the wrong weather stripping can leave gaps, waste energy, and wear out faster. Always choose weather stripping designed specifically for garage doors. It will seal better, last longer, and keep out wind, rain, and dirt.
Poor Measurements
If you do not measure correctly, the weather stripping might be too loose or too tight. This can let air, water, and bugs inside. Always double-check the measurements of the top, sides, and bottom before cutting and installing the weather stripping.
Ignoring Weather Changes
Hot and cold weather can make your weather stripping stretch or shrink. If you don’t check it, the weather stripping can crack or come loose. Inspect your garage door weather stripping twice a year to ensure it remains in good working condition.
How to Maintain Your Garage Door After Installation
After installing new weather stripping, taking care of it helps keep your garage sealed and protected. Regular maintenance keeps it strong, saves you money, and extends its life for years.
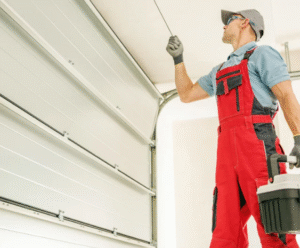
Inspect Your Weather Stripping Regularly
Check your weather stripping every three months. Look for cracks, gaps, or damage. Addressing small issues promptly keeps your garage sealed and helps you avoid costly repairs. It’s an easy way to protect your home and save money.
Watch for Signs You Need to Replace It
If your garage feels drafty, your bills go up, or you see peeling or shrinking strips, it’s time to replace them. Damaged weather stripping won’t seal properly. Replacing worn seals keeps your garage warm, dry, and energy efficient all year round.
Follow a Seasonal Maintenance Checklist
Taking care of your weather stripping through the seasons helps protect your garage from drafts, water, and damage. Use this simple seasonal checklist to help your weather stripping stay strong and last longer:
Spring:
- Wipe the weather stripping using gentle soap and water.
- Check for cracks, gaps, or loose sections.
- Reattach or replace damaged areas.
- Apply a silicone-based lubricant if needed to keep it flexible.
Summer:
- Inspect the weather stripping for signs of heat damage like warping.
- Make sure the seal is still tight against the door frame.
- Replace any brittle or worn-out sections.
- Clean off any dirt, dust, or debris.
Fall:
- Test for drafts around the garage door by feeling for cool air leaks.
- Tighten any loose fasteners holding the weather stripping in place.
- Clean and dry the weather stripping to prepare for colder months.
- Add extra sealant if needed for better insulation.
Winter:
- Inspect after heavy snow or storms for water leaks.
- Gently remove any ice buildup around the weather stripping.
- Check that the seal is still strong and flexible.
- Plan for a full inspection when the season ends.
Frequently Asked Questions
How Long Does Garage Door Weather Stripping Last?
Garage door weather stripping usually lasts about 5 to 10 years. Weather, sunlight, and daily use can wear it out. It’s a good idea to check it every year and replace it when you see cracks or damage.
Can I Install Weather Stripping Myself?
Yes, you can install garage door weather stripping yourself using simple tools like nails, glue, or a screwdriver. Make sure it fits well to block air and water. For a safe installation, experts from Bluefox Garage Doors in Phoenix are here to help.
How Do You Seal the Gap on the Side of a Door?
To seal the gap on the side of a door, you can put on weather stripping or a door seal. It covers the open space so cold air, rain, and bugs can’t get inside and cause problems.
What Is the Best Way to Waterproof a Garage?
The best way to waterproof a garage is to fix cracks, add strong garage door weather stripping, coat the floor, and make sure water drains away. This keeps rain and moisture out and helps protect your garage.
How Do You Weather Seal the Sides of a Garage Door?
To seal the sides of a garage door, add a rubber or vinyl strip to the frame. It should press tightly against the door when closed to block air, water, and dirt. For better results, a professional weather seal replacement can help it last longer.
Conclusion
Installing garage door weather stripping correctly helps block out dust, rain, and hot or cold air. A good seal makes your garage cleaner, saves energy, and keeps your home more comfortable. Learning how to install garage door weather stripping is a smart and simple way to protect your space.
Bluefox Garage Doors in Phoenix is here to help if you want a fast and professional upgrade. Our team can install strong weather stripping that lasts, helping you enjoy better comfort and lower energy bills. Proper sealing also protects your garage door from damage over time.
Take action now to make your home better. A small step like installing weather stripping brings big rewards. Visit our helpful guides or book our services to keep your garage safe, energy-efficient, and ready for every season.
End Note
If you need help with how to install garage door weather stripping, Blue Fox Garage Doors in Phoenix is ready to help you. Visit our homepage to see all the services we offer. You can also meet our friendly team by visiting Meet Our Teams today.
You can learn more About Us and check out our Weather Seal Replacement service. We proudly serve many areas, and you can find them at the Service Areas. Read what our happy customers have to say about us on Yelp and Thumbtack.
To get started, book your service through Schedule Service. We work hard to give you fast, friendly, and trusted service. We are here to make your garage safer, more comfortable, and ready for every season.